The first step before changing the climate data is to set the Project Location. This is important considering that choosing one of the climatic zones of South Africa would not help you to locate the project correctly.
To do this you can access the Project Location from Energy Model Review > Environment Settings…
With the Project Location window open you can then enter a Latitude: and Longitude: Please note: this can be entered as “decimal degrees” or “degrees, minutes, seconds” by clicking on the arrow pointing to the right.
You can verify the coordinates that you have entered by clicking on the button “Show in Google Maps…”
 Once you have done this you can click on “OK” to close the Project Location window. You should then see Environment Settings window once again. Now click on button “Climate Data”
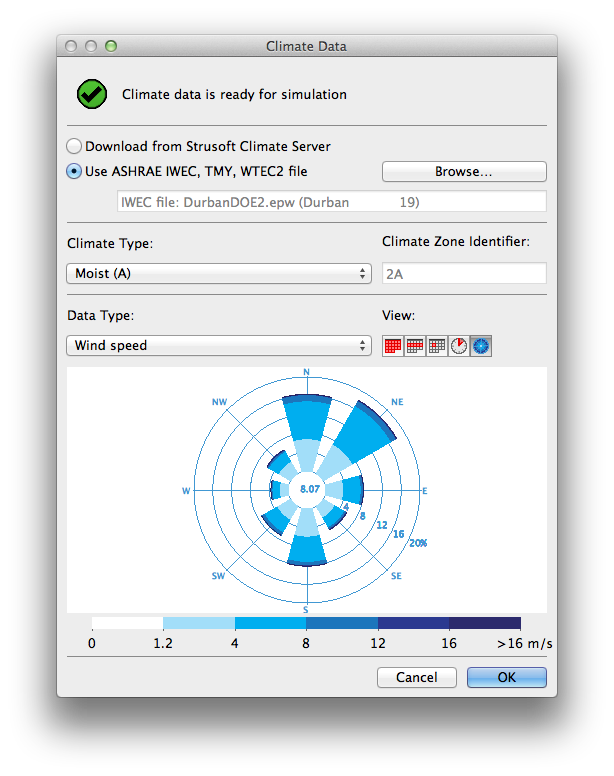
Now click on the option: Use ASHRAE IWEC, TMY, WTEC2 file and then click on the “Browse…” button
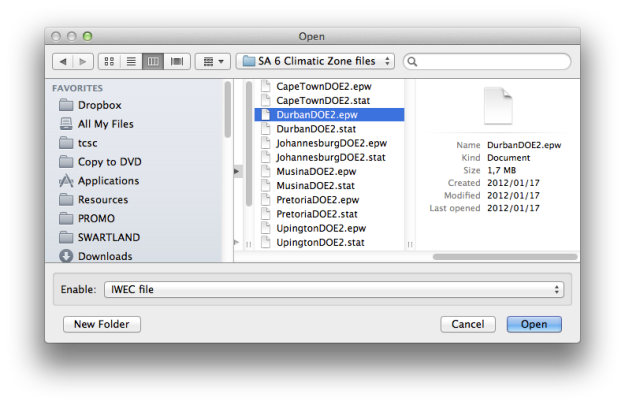
You can now select one of the 6 climatic zone files. This can be accessed by downloading as per my previous blog. Then click on “Open” to close this window. The climatic data referenced will now be shown. In this example I choose Durban. Please note: that this data would not be as accurate as the climate data downloaded from the Strusoft Climate Server which would be related to the exact location. Whereas the Durban.epw file covers East London to Richards Bay?
You can now close the Climate Data window by clicking on “OK”.


Reblogged this on ArchiCAD SADC.
Awesome Gideon, thanks a million.
It would be really great and beneficial to many of us if you could do a series of these tutorials outlining the steps and workflow process that we need to go through in order to achieve the correct results.
(No pressure, ha ha)